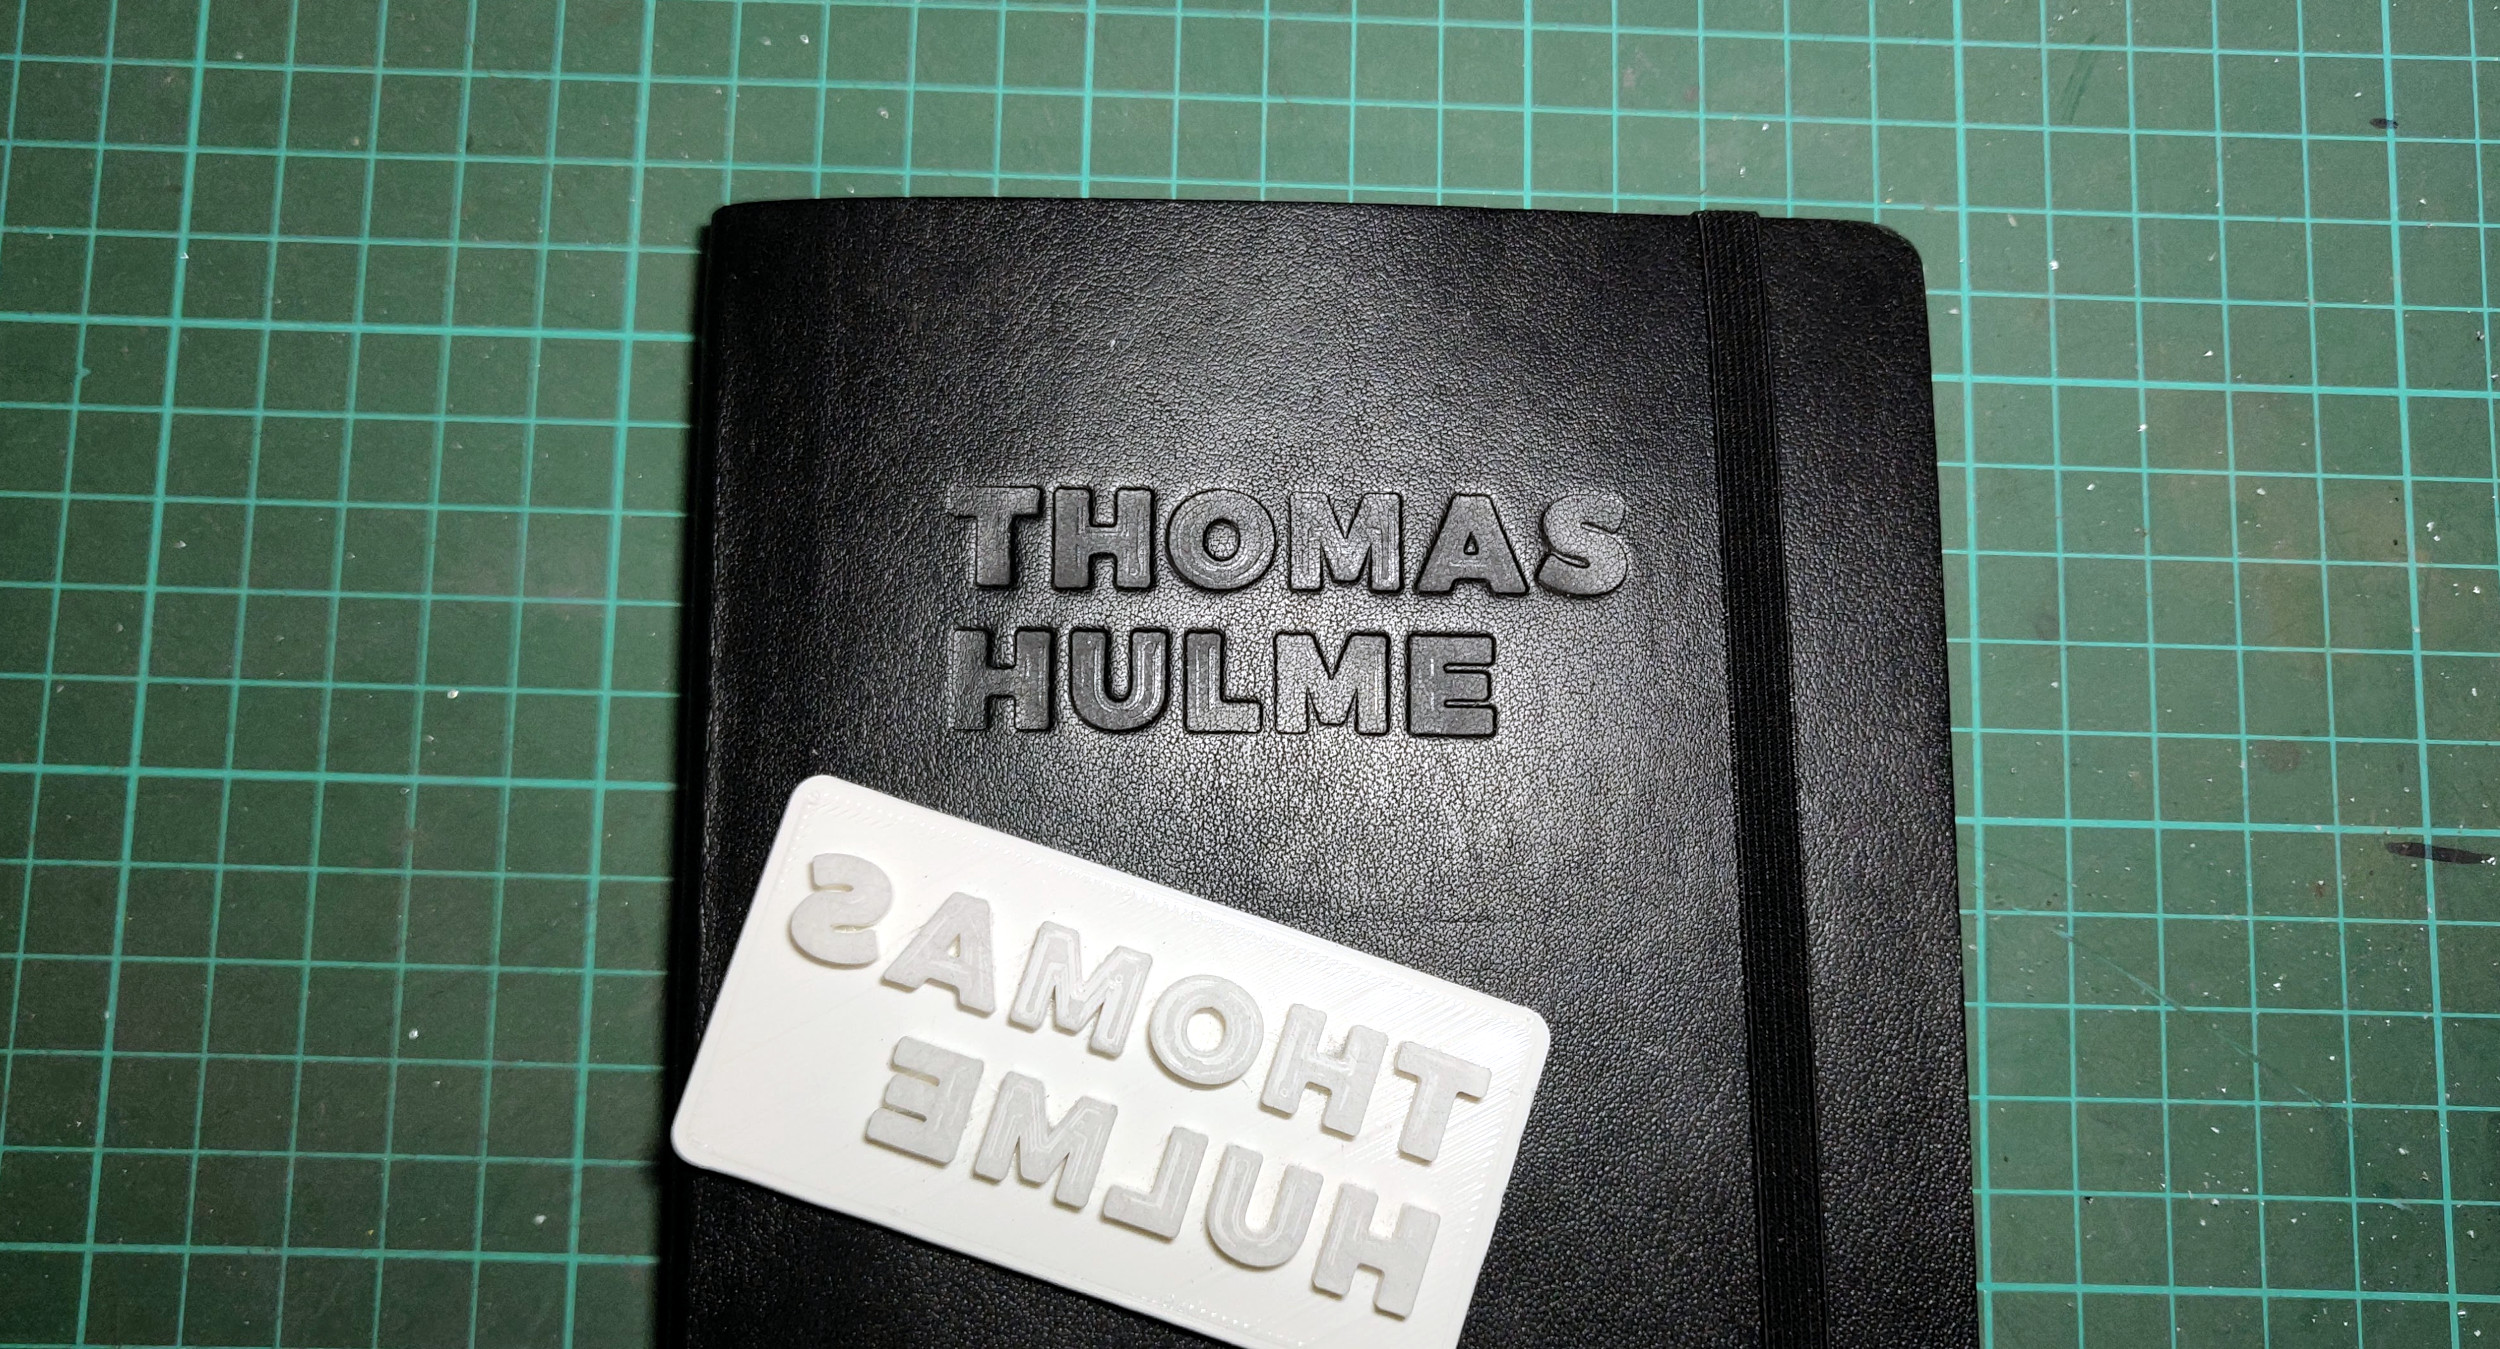
Just a quick build to personalise my notebook by debossing the front using a 3D printed tool.
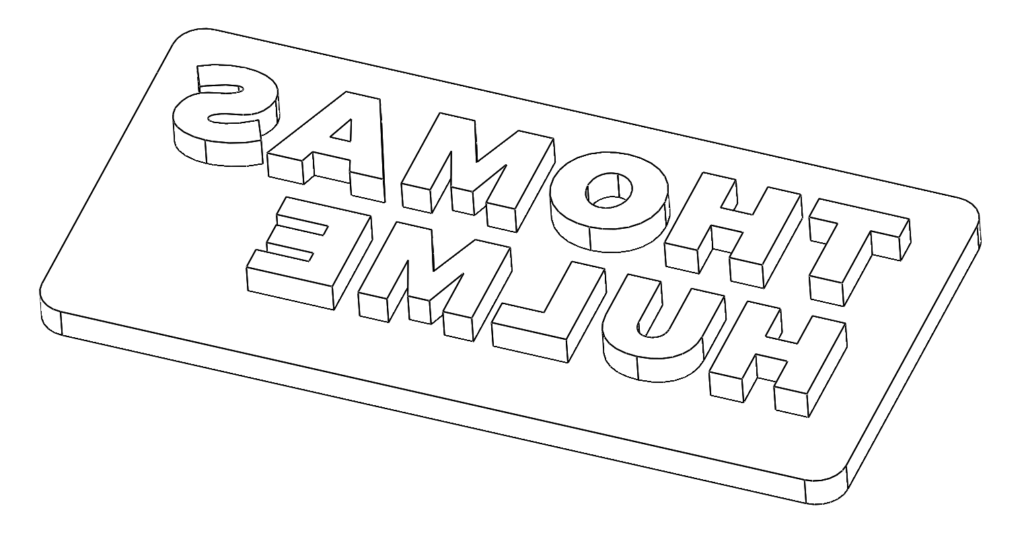
3D printed using 100% infill to create a solid part, this should ensure it doesn’t crack when clamped together.

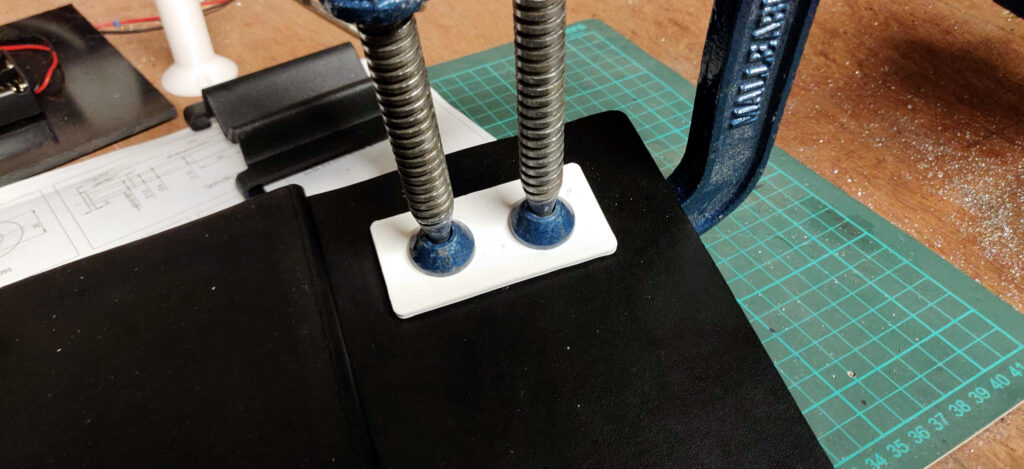
The method of debossing could not be easier, just place the printed tool in the right location, support the underside with something hard like a sheet of metal and clamp it all together. The clamps must be as tight as you can go to achieve the best results.
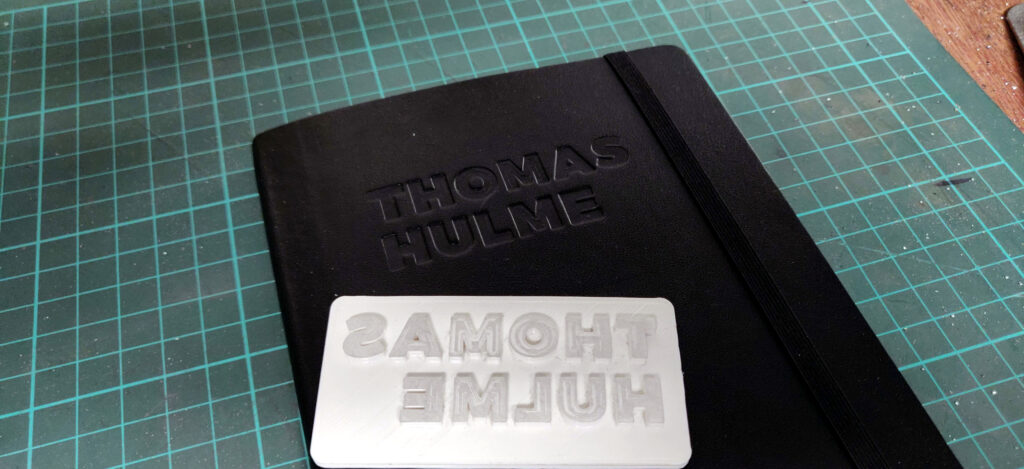
After leaving it clamped together over night the final effect can be seen:
SIDE NOTE
Sometimes heating up the notebook using a hot air gun can improve the results (A hair drier would also work).