
Inspired by Zumo, the robot from Pololu, this is a tracked robot using an Arduino for control. The name STAR comes from Small Tracked Autonomous Robot, this sets out my intentions for the project, to be an autonomous robot that only has minimal user input, such as mode and settings changes.
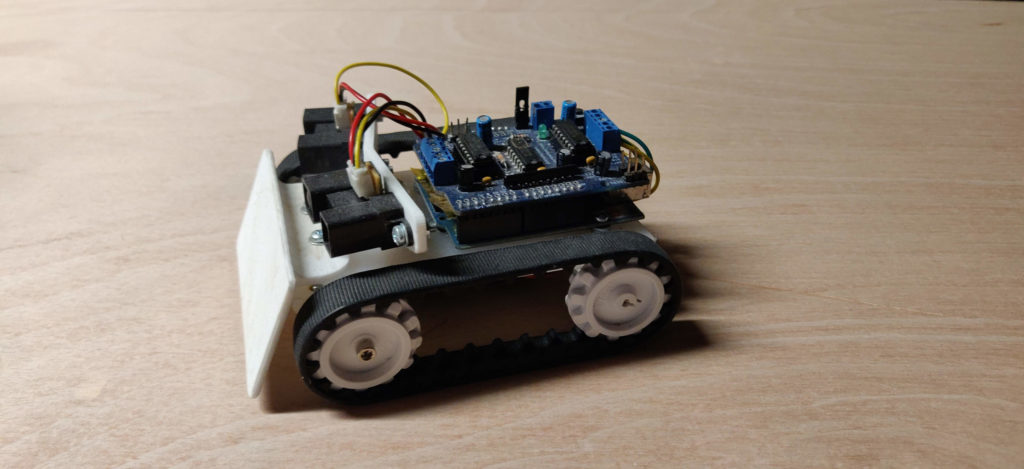
MK1 was an initial prototype to prove out the idea. This mainly consisted of:
- Arduino Duemilanove – I already have one of these spare from a previous project.
- Adafruit Motor Shield MK1 – I already have this on hand too from a previous project.
- Pololu 30T Track Set – I chose this size to give enough room for prototyping, I may move to the smaller track set during a later development.
- Plastic Sheet Chassis – Nylon will be used due to its machining quality.
- 3D Printed brackets – PLA
- 2x 6V micro metal gear motors with 50:1 reduction gearbox from Pimoroni
- 2x Sharp distance sensors – Can detect objects between 200mm and 1500mm away.
- 2x 14500 LiPo batteries – AA Size
- 3D printed front plough – To push objects out of the way. PLA.
The first aim for the robot is to move autonomously by driving forward until the distance sensors detect an obstacle, then the robot will turn away from the obstruction and continue moving forward.
CHASSIS
To mount all this equipment I designed a chassis using 5mm thick Nylon sheet and 3D printed brackets. The reason for not 3D printing the whole chassis is because of the size limitations of my 3D printer (120mm cubed).
The width of the chassis is determined by the Arduino board located on the top and the length of the two motors underneath. The length of the chassis is again determined by the Arduino, but also the Sharp distance sensors and front plough.
The simple design I came up with is inspired heavily by Pololu’s Zumo robot:
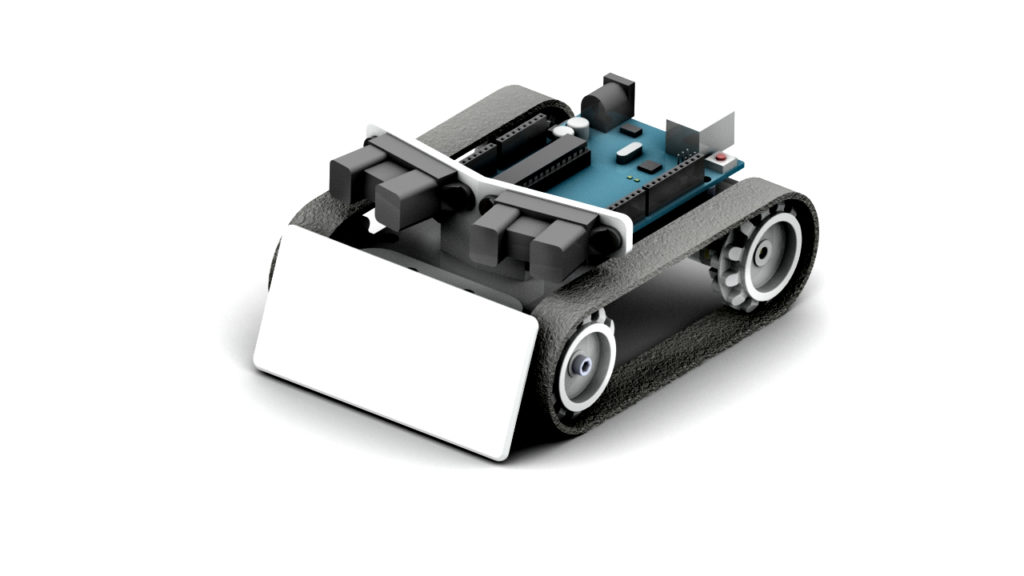
The chassis only has simple 2D cuts which are achievable by hand, the equipment is attached by M3 threaded inserts, heat set into the Nylon sheet. The brackets for attaching the motors and free-spinning wheels are 3D printed and screwed into position.
SENSORS
The two Sharp distance sensors are mounted at the front 160 degrees apart to maximise their coverage. Both sensors return a variable voltage depending on the distance to the object in front of them. Attaching them to an analogue input on the Arduino is enough to measure the voltage returning from the sensor.
I’m not really interested in the exact distance of the object in mm so keeping and using the raw analogRead() value will be enough.
CODE
The Arduino code is based upon the sample code by Adafruit for thier motor shield and sets out a simple loop for moving forward, then deciding to go left or right when an obstacle is detected.
// STAR MK1
// Thomas Hulme
// thomashulme.co.uk
// May 2019

// Include Adafruits motor shield library
#include <AFMotor.h>

// Setup the motor classes for both left and right motors
AF_DCMotor motorL(1);
AF_DCMotor motorR(2);

// Distance variables
int LeftDistance;
int RightDistance;
int avg_LeftDistance;
int avg_RightDistance;

// Amount of smoothing to add to the distance sensor readings.
const float distance_smoothing = 0.5; // 1 = No smoothing, 0 = Full smoothing

void setup() {
  Serial.begin(9600);
  Serial.println("STAR MK1 test!");

  // Set the motor speed of each motor.
  motorL.setSpeed(200);
  motorR.setSpeed(10);

  // Stop the motors
  motorL.run(RELEASE);
  motorR.run(RELEASE);

  // Wait for a second
  delay(1000);
}

void loop() {

  // Get the distance measurement for both left and right, map the readings to ensure a simular reading on each sensor for the same distance.
  LeftDistance = map(analogRead(A5), 0, 230, 0, 150);
  RightDistance = map(analogRead(A4), 10, 280, 0, 150);

  // Moving average filter
  avg_LeftDistance += (LeftDistance - avg_LeftDistance) * distance_smoothing;
  avg_RightDistance += (RightDistance - avg_RightDistance) * distance_smoothing;

  // Print the distances, to plot on the computer.
  Serial.print(avg_LeftDistance);Serial.print(",");Serial.println(avg_RightDistance);

  // If both distances are below 200 then move forward
  // Sharp sensor returns a higher value the closer an object is.
  if(avg_LeftDistance<200 && avg_RightDistance<200){
    motorL.run(FORWARD);
    motorR.run(FORWARD);
  }else{ // Stop the motors
    motorL.run(RELEASE);
    motorR.run(RELEASE);
    delay(500);
    // If left distance is bigger than right distance , then move right, else move left.
    if(avg_LeftDistance>avg_RightDistance){
      motorL.run(FORWARD);
      motorR.run(BACKWARD);
      delay(300);
    }else{
      motorL.run(BACKWARD);
      motorR.run(FORWARD);
      delay(300);
    }
  }
  delay(50);
}
RESULTS
After turning the robot on it moves forward until an obstacle is met, it then spins away from the obstacle and continues moving forward.
There are obviously things I need/want to change for STAR MK2, here are some of the main points:
- The motors are not of the same quality which shows when powering them at the same voltage. The left motor requires a set point of 200 to enable it to move forward, anything lower results in it stalling, while the right motor only requires a set point of 10. Having better quality motors should sort this out, but also having motor encoders on each shaft will ensure that both motors spin at the same rate no matter the quality.
- The motors used have a reduction gearbox of 50:1, however this is not enough and the robot moves forward way to fast, also at slow speeds they stall due to their lower torque. The next motors should have a bigger reduction of the motors to enable slower movements and achieve greater torque.
- The battery chemistry used is Lithium Ion Polymer which requires special charging and discharging characteristics, the battery has built-in protections circuits to prevent over discharge, however I do not want to rely upon them for preventing fires, having short circuit protection would also be beneficial as I have burnt through two batteries already by accidentally connecting the power to GND.
- Adding wireless telemetry via Bluetooth would also enable me to develop the software quicker by showing the real world feedback, removing the need to constantly program and test repeatedly