
I’ve been looking at getting a CNC mill/router to complement the 3D printer for a while now. A small desktop sized one, capable of cutting plastic parts. The limiting factor has always been cost though, some of the commercial ones, even hobby desktop ones can run into the thousands of pounds. My requirements for the machine where to cut plastic sheets, of roughly 200mm squared with ease while keeping the costs down, but also have the ability to be upgraded by me later on.
I’m an engineer by trade and considered designing and creating one from scratch using aluminium extrusion profiles, however to start with I decided to buy a capable base and use itself to create upgrades. Eventually creating a new, more capable machine later.
Some of the existing options I looked at included:
OTHERMILL/BANTAM TOOLS. The machine is made with cut sheets of HPDE and uses the enclosure as the frame to mount the linear guides. With a work area of 114mm x 139mm the machine is limited in what it can cut, however this should be enough to start off with. Despite that, the biggest factor for not choosing this machine was the cost. At around £2400 the machine is way to expensive for me to justify.
NOMAD 883. The NOMAD has a work area of around 200mm squared which is much larger than the OTHERMILL and also uses more metal components. This should mean the machine is stiffer and more capable for cutting. The machine is also cheaper at £2000. This is still relatively high and again I was unable to justify that cost.
GENERIC 3018 PRO. This machine design doesn’t really have a single company selling it and can be picked up from eBay or Amazon for around £180. Justifiable cost, but this low cost is for a reason. The small diameter linear guides, plastic z-axis and RC car spindle don’t inspire confidence. This design however does give a good opportunity to upgrade parts and easily swap in higher performance components.
2030 CNC
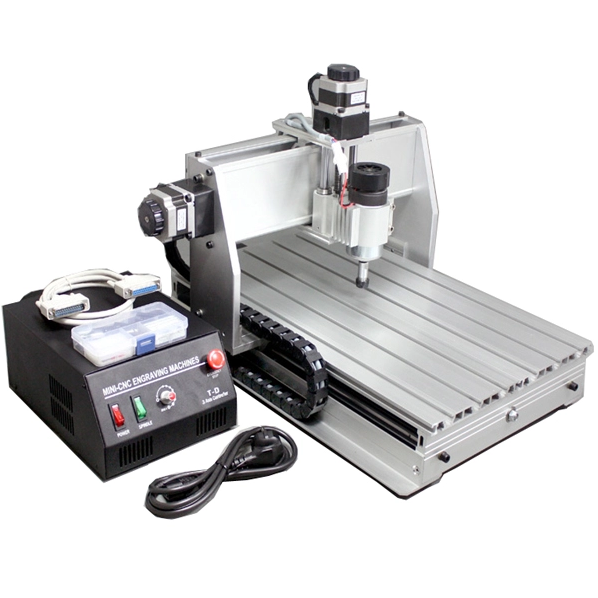
After some more research though I decided to go for a GENERIC 2030 CNC from eBay. Buying it from a random name was risky but eBay protection should sort things out if needed. The reason for picking this machine was firstly the cost, around £300 with free postage and secondly because of the work area, 200mm x 300mm.
My ideas for the machine are to upgrade each part of the machine one by one, using itself for creating the upgrades. This would give me a machine that at the start would be good enough for cutting the plastic parts I wanted but also gave me the opportunity to upgrade to a better and more capable machine, spreading the cost.
After ordering the machine (From a UK warehouse) it arrived a few days later well packaged in polystyrene and had no shipping defects. Everything is included in the package, the machine, the controller and a set of clamps with tools to adjust all the bolts. To my surprise it also came with a single 3mm end mill and 4 engraving bits of varying cutting angles.
WORKBENCH
First port of call was to create a workbench to place this machine on. My idea was to create a miniature version of my current workbench because I already had quite a few remaining lengths from the build (I over ordered the studding to be safe). The height of the bench is the same as the workbench in case I want to place them side by side, but the width and depth are sized to the machine. The top surface is made from two sheets of 5mm plywood, creating a solid base to support the machine.
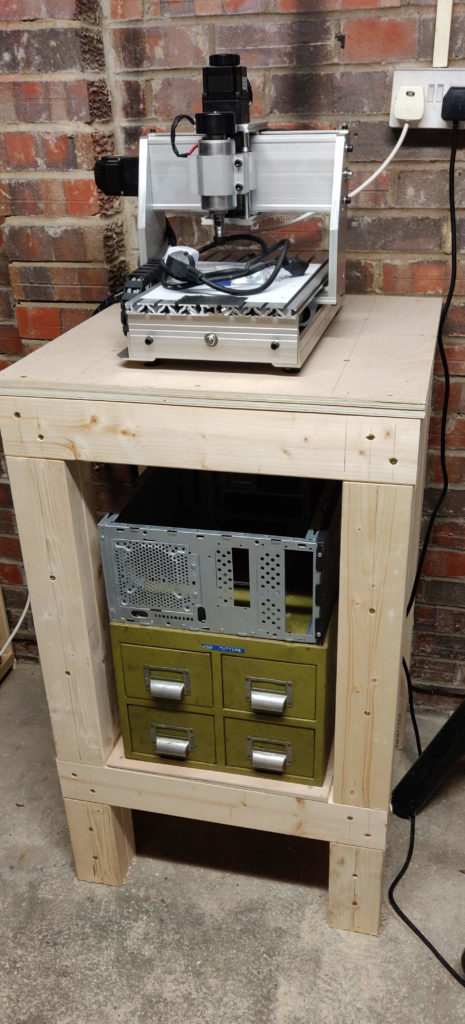
The metal drawers where added to give the base some weight and vibration reduction. But even without them the bench is pretty hard to move and would require a set of wheels to push it around.
ELECTRONICS
Before powering up the machine for the first time I wanted to check all the high voltage electronics. Opening up the controller was fairly easy, there’s around a dozen screws around the perimeter that hold the sheet metal panels in place.
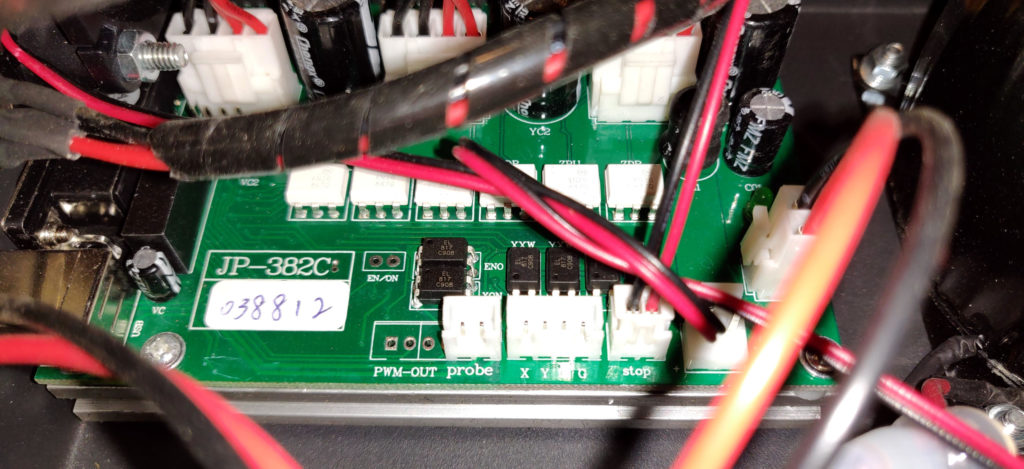
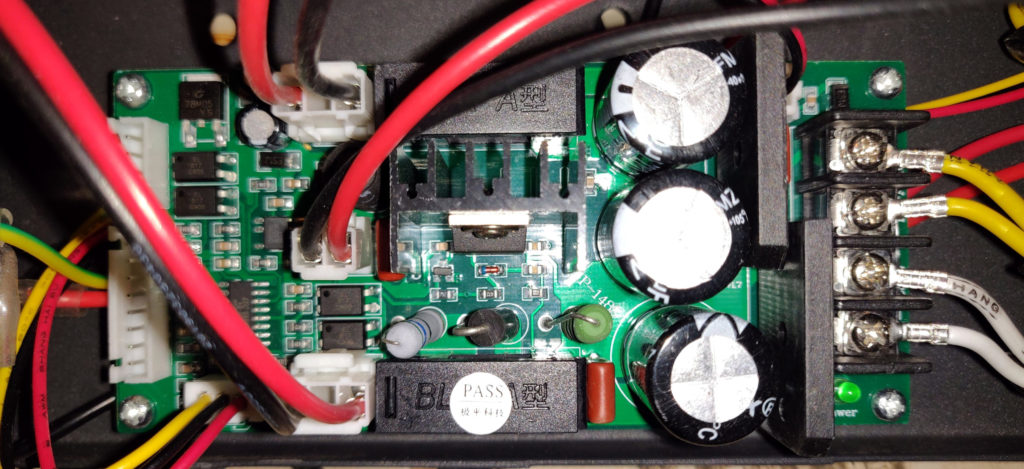
All the connections inside seem to have good crimped ends and use fairly thick wires. After checking the earth connection using a multi-meter I reassembled the case and powered it on for the first time.
CONTROLLER
To control the machine from a computer the two options are a parallel port or USB. I’ve never owned a machine with a parallel port (It’s 2020 who does?) so I’d be using the USB port. The machine came with a CD for the USB controller software so my first move was to find a “disposable” computer/laptop. This is because I didn’t want to put a random CD into my laptop and install random, likely pirated software into it. I found an old Windows XP netbook to use, perfect for the job.
The software on the CD was an old copy of PlanetCNC, so I’m assuming the controller is also a copy of a PlanetCNC board. After some research on the controller board this was right and was presumably a copy of a copy of PlanetCNC’s MK1 board. Nevertheless after installing the software I could jog the machine in X, Y & Z. The spindle control is manual, via a potentiometer on the front panel.
This is when I found the first problem. When running the first file of G-Code the software warns that this is an evaluation copy and is limited to 25 lines of G-Code. The only two options I could see where to either buy the full software or replace the controller. A PlanetCNC licence is 69 Euro, but after looking through forums of people with the same problem it seems that the software doesn’t always recognise the controller, due to it being a copy of a copy. So the next option was to replace the controller.
PlanetCNC has a blog post on replacing these controllers with a genuine MK3 board from them. This seems like a good option but required permanently altering the controller box, something I was trying to avoid.
After some more internet searching I found plenty of people that where using an Arduino with GRBL to control the parallel port on the controllers. The computer would run the controller software, connected to the Arduino via USB and the Arduino would send the required pulses to the CNC controller along the parallel port. I decided this would be a temporary solution as I wanted to design and create my own controller at some point. As this was a temporary solution I bought a parallel cable and hooked it up to an Arduino up using breadboard jumper cables.

I finally had full control of the CNC and could send more than 25 lines of G-Code. It was at this point I decided to buy and use a Raspberry Pi for the computer instead of the Windows netbook due to it being cheaper to replace after an accident (Hopefully this doesn’t happen) and because of the huge support it has online from many people.
SOFTWARE
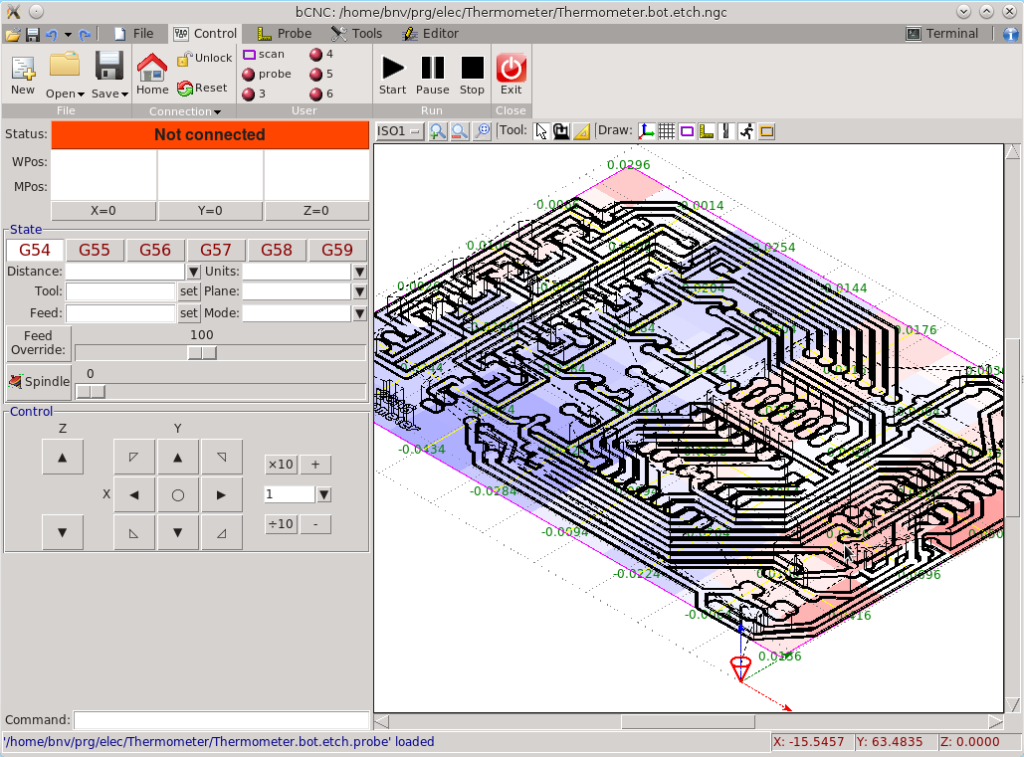
There are countless options for software to control GRBL, an advantage of being open source. I’m going to start with bCNC as it seems the most feature rich.
Setting up GRBL for the CNC machine is as simple as sending $ commands to the Arduino using bCNC’s terminal. I had to setup the steps/mm, default bed size and direction of stepper motions, then all was ready. Something to note though was GRBL’s 30KHz maximum step count, anything above this will result in the Arduino randomly stopping mid job. To calculate this use the following formula:
(Resolution in steps/mm) * (Acceleration in mm/min) / 60 = <30KHzAfter all this the machine was setup and ready to cut material. The next sets are to model a test piece and program the G-Code.